|
|
|
 |
|
|
|
|
||
|
|
|
|
|
|
| Ok, here's where I go off the beaten path.
I do the bulk of my elevation work before inserting final shapes.
If I haven't said this already, I can be easily distracted and sloppy.
Not a good thing when I'm trying to elevate 1/2 of a green and it's surrounding
fringe - but trying to keep the bunkers just slightly lower, etc. Anyway,
trying to elevate my nice shapes from a flat position to a contoured final
product meant I screwed up all over the place. Missing verts, tilting
too much, (place your problem here), etc. I don't have the skills
others have to see a shape in their verts and know how to raise them for
the desired look.
So I needed to work with less verts. The time that you have the least amount of verts to worry about is before you start inserting shapes or assigning textures to faces. The other thing for me was to keep the verts organized - so I reassign faces to regions that I want to work with. I also work on elevation in a few steps.
First I elevate the whole course, then I work on each hole one at a time.
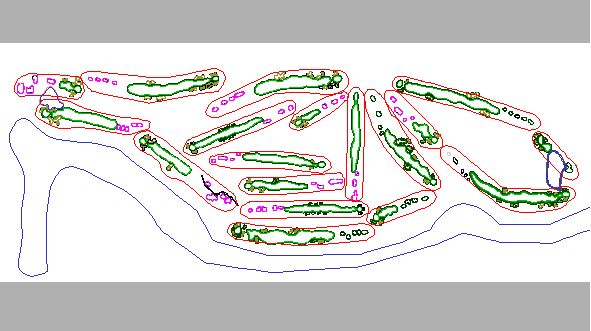
So to start, I grab a screenshot of my course layout. SnagIt http://www.techsmith.com/ is what I use, it has a 45 day free demo period. I take the hull and verts and texture off of my top display and end up with something like this. |
 |
|
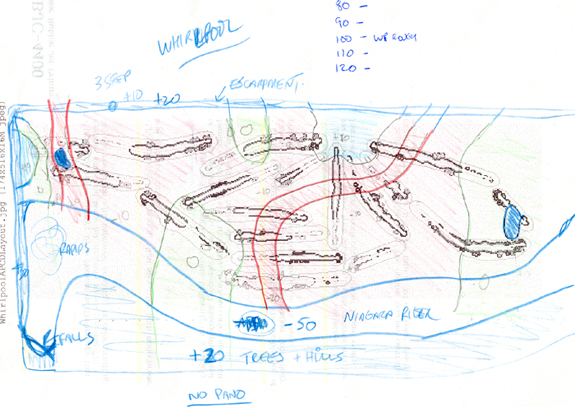
I print this up, then I borrow my 6 year old's colouring pencils and I map out the contour lines of the course on my print out. Whirlpool is fairly flat so this one was easy. That said, no course is as "flat" as the program will make it. Flat in the APCD is FLAT. Later on, I'll work on the flat areas and give them some roll but on a hole by hole basis. |
 |
 Man,
am I an artist or what? Fortunately, I don't need any art skills
in my job. I take this rough sketch and then select areas using the
"drag select" button. I make sure that I go around greens, tees and
bunkers depending on where they fit the elevation. Because I have
not added any extra verts I try to make sure that I am clear of those shapes
and I don't have an elevation change in the middle of a bunker, unless
I want one there. Then I change the face to another texture.
I can always change it back. I try to go around the outside edges
of the region, then use the "region select" button for the area that is
in the middle. Once, I've got all my "contour lines" made I raise
or lower each area to the desired height by selecting all of the verts
in a region. Man,
am I an artist or what? Fortunately, I don't need any art skills
in my job. I take this rough sketch and then select areas using the
"drag select" button. I make sure that I go around greens, tees and
bunkers depending on where they fit the elevation. Because I have
not added any extra verts I try to make sure that I am clear of those shapes
and I don't have an elevation change in the middle of a bunker, unless
I want one there. Then I change the face to another texture.
I can always change it back. I try to go around the outside edges
of the region, then use the "region select" button for the area that is
in the middle. Once, I've got all my "contour lines" made I raise
or lower each area to the desired height by selecting all of the verts
in a region. 
Just to be picky about it, I made fairway textures that are labeled "+10", "-20" etc. If you are interested I can send them to you. Seems like more work but I'm just trying to make sure I have my bases covered because I am prone to miss things. |
|
Now I have a layout that looks like this. |
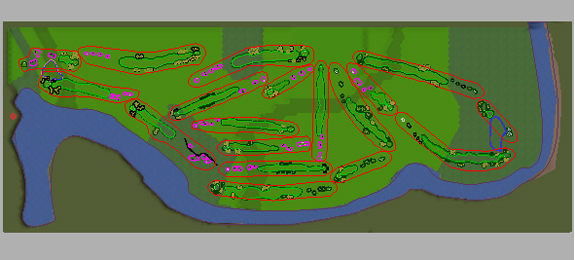 |
| All of the regions have been raised or lowered to match my sketch. From here I can start working on each hole but I'll go into that when I have more time. |