|
Step 2 -
Vert Positioning
|
|
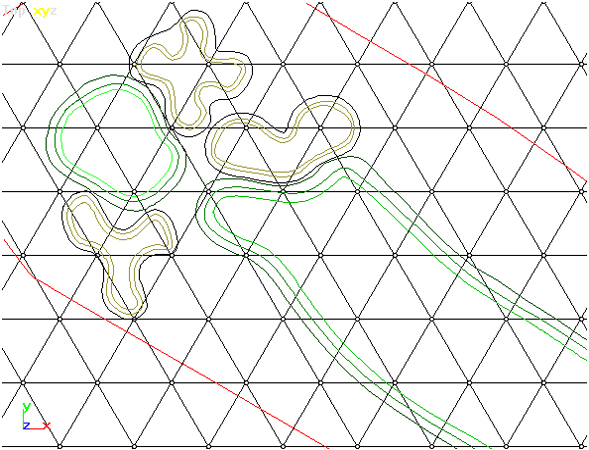
| Ok, I've layed out my hole - time to insert
those shapes - hang on, slow down there big boy. Here's a section
of the 1st hole. I'm using a mesh density of 50 feet.
Before I insert anything or play with elevations I'll make sure that the
verts are where I want them. You'll see a lot of talk about cleaning
up you mesh AFTER you've inserted things. I've found that it is easier
for me to clean them up before. I still have some cleaning up to
do afterwards but much less than if I didn't take this step. |
So what do I mean by moving the verts?
Look at shapes above. Going by any tutorials available I want those
bunkers to end up looking like there is a vert at each tip and a few in
the middle and the edges should have nice symmetric edge lines going from
the outside of the edge into the verts in the middle. If I insert
shapes or create faces as is, then I'm going have to do some clean up before
I can achieve those "perfect meshes." The confusing thing for me
was getting my messy mesh into a clean one. I couldn't visualize
the end result. Plus it was very tedious. So, why not start
off with the end result? Move the nearest verts into the middle of
the bunker tips, the center of the green and fairway and definitely move
verts away from the edge of shapes you plan to insert. Otherwise
you can end up with overlapping verts which cause harsh shadows and are
a PITA to work with if you don't catch them and get rid of them. |
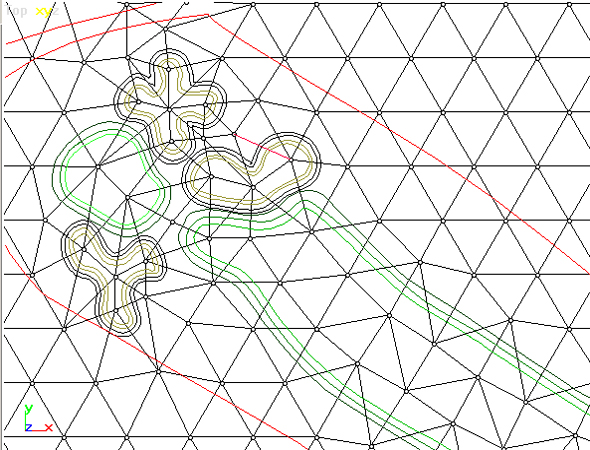 |
| There, now I have verts at the tips of
where the bunkers will go, verts in the center of the green and nice consistent
rows of verts in the fairway. In this case the green is going to
slope from back to front so I have an "upper green" vert and a "lower green"
vert. I added a few verts and turned a few edges in order to
achieve this overall look but it was nowhere near the clean up aftermath
of if I just went ahead in inserted the shapes. With this skeleton
in place inserting shapes or creating of faces follows where YOU decided
the crucial verts should be. Clean up is quite minor. Hey,
what about those "stretched" areas Kev? You will be adding more verts
once you insert your shapes or create faces so in the end the stretched
areas won't be so stretched anymore. If they still are "stretched"
then add a vert. Just for fun here's the layout with the green, fairway
and bunker shapes "inserted" - no clean up - as is. |

|
| Needs work but at least now I can
see where I need to turn edges and such. I believe from my brutal
first work with this program that even if you only do this step (it took
no more than two minutes for this hole), you will end up with a mesh that
is easier to work with. |
| |
| |
|
|
