|
|
|
 |
|
|
|
|
||
|
|
|
|
|
|
| Hopefully, you've spend some time fooling around with the auto shape function and tried to edit those shapes into ones that you want. Now it's time to get a little more accurate with your layout. I use a tablet to create my shapes, using a print out of a yardage book as a guide. Next course, I'll do what I'm going to show you here. You'll need to have some form of graphics program (I have photoshop - but from what I understand Paint Shop Pro (a much more inexpensive shareware program) will work fine. Other than that, you'll need a scanner and a yardage book OR a website that has a hole by hole layout of your course OR pictures from TerraServer http://terraserver.homeadvisor.msn.com/default.asp . I'm going to make each hole a separate texture so I can use them as guidelines in the APCD program itself. Something like this. |
 |
|
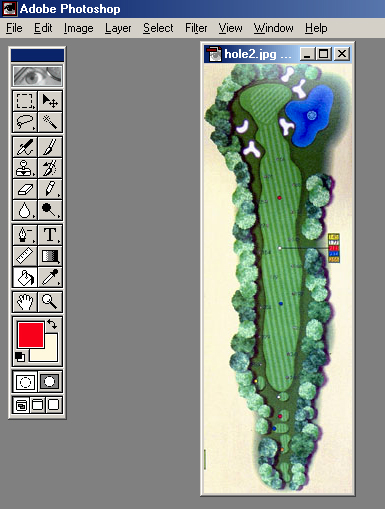
First thing is to scan your hole or save a picture off the internet (right click and "save image as" usually does it. Next open it up in your graphics program. This is the 2nd hole at Whirlpool. |
 |
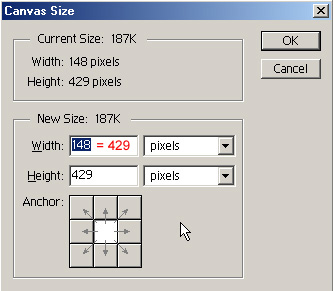 I'll
go into the image properties and resize the CANVAS, not the Image.
Need to make it a square image. So in this case I need it to make
429 by 429. Just look at the largest number and make the other dimension
the same. I'll
go into the image properties and resize the CANVAS, not the Image.
Need to make it a square image. So in this case I need it to make
429 by 429. Just look at the largest number and make the other dimension
the same. |
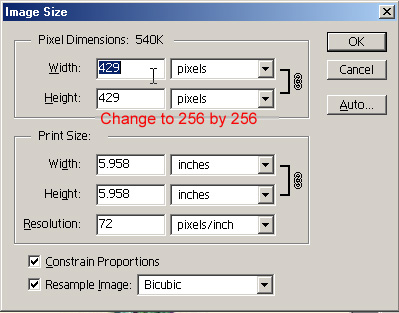 Now
I need to resize the IMAGE to 256 by 256 and save it as a Targa ( .tga
) file. This is the format that the APCD accepts for texture files.
Save it as a 24 bit - if you are using Paintshop Pro - make sure you select
"uncompressed" or your targa's won't import. Repeat this for
every hole image. Now
I need to resize the IMAGE to 256 by 256 and save it as a Targa ( .tga
) file. This is the format that the APCD accepts for texture files.
Save it as a 24 bit - if you are using Paintshop Pro - make sure you select
"uncompressed" or your targa's won't import. Repeat this for
every hole image. |
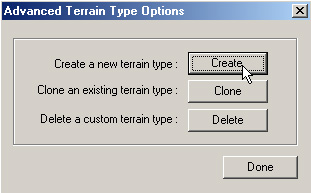
 Oh
kay doe kay, time to open up the APCD. You don't need to worry about
the course plot, either let it open with it's default 1000x1000 or select
the size you want. We need to create 18 new textures, one for each
hole. I'll go to the "Terrain" tab - click on "Advanced Options" - then
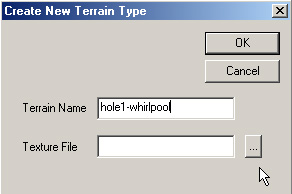
"create a new terrain type". I'll give the terrain a name (to be
less confusing call hole 1 - "hole 1") and select the hole .tga file. Oh
kay doe kay, time to open up the APCD. You don't need to worry about
the course plot, either let it open with it's default 1000x1000 or select
the size you want. We need to create 18 new textures, one for each
hole. I'll go to the "Terrain" tab - click on "Advanced Options" - then
"create a new terrain type". I'll give the terrain a name (to be
less confusing call hole 1 - "hole 1") and select the hole .tga file. |
  |
| I'm cheating here and I'm actually working on the 2 and 3rd holes to show you how to line them up. The second hole is 405 yards (center of back tees to center of green). So, I need to mark off enough space for the hole. I take the tape measure and I've measured off about 460 yards - the next vert up was 408 - better to give yourself a little space as you image is not quite the whole 256 by 256 pixels. |
 |
|
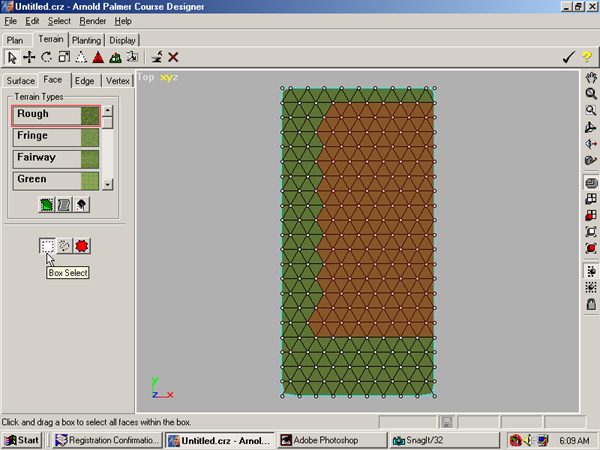
I'm going to go into the terrain section chose "block select". Then I'll highlight that 460 yard plot of land so it looks like this. |
 |
|
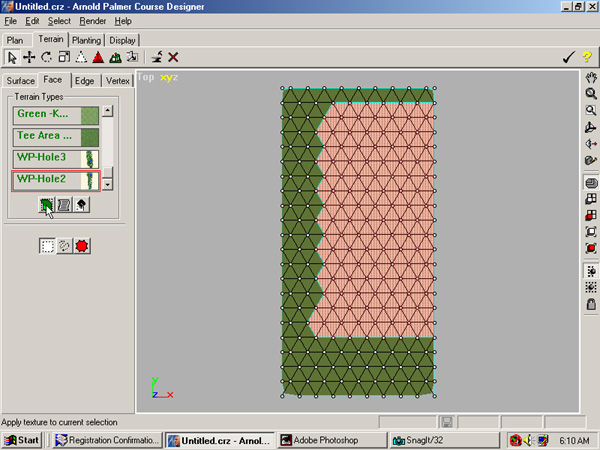
Now I'm going to select a Face for this terrain - since it is hole 2 - I'll make it the hole 2 texture. |
 |
|
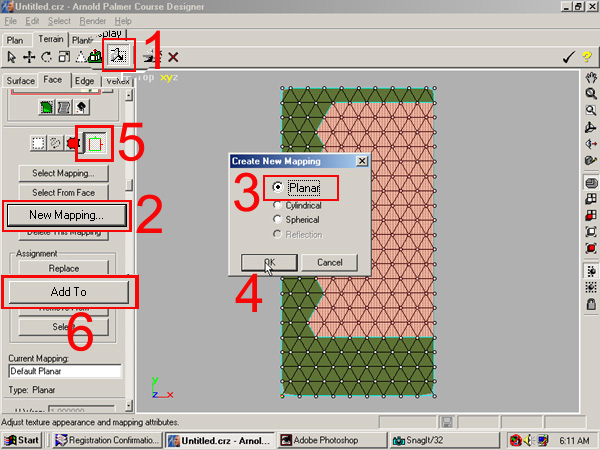
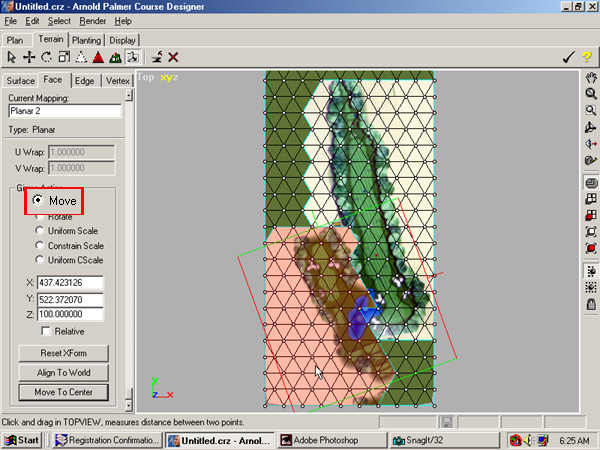
Hey, that didn't work - where's the hole? Now we're into texture mapping. Gotta scale this sucker. 1. click on the Texture Mapping icon 2. select "New Mapping" 3. select "Planar" 4. click "ok" 5. make sure that you have a Planar mapping in the "current mapping" window - do not mess with the "default mapping" as that will effect everything set at default. Then click on the "gizmo" 6. click "Add to" |
 |
|
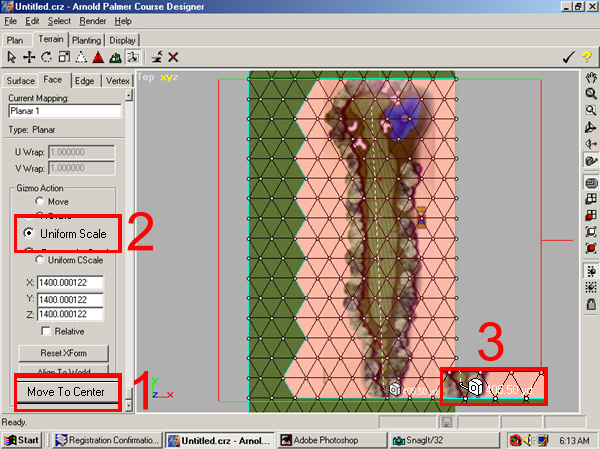
Then you want to 1. "Move to Center" - by now you should see the "gizmo square" 2. select "Uniform Scale - because it is uniform you can type a number in either the x, y or z value and they will all be the same. Now we're blowing up a huge piece of land here - type 1000 in the X value and see what you get. 3. Pull out the measuring tape again and see if you are close. This hole needed to be 1400. A par 3 is about 850. |
 |
|
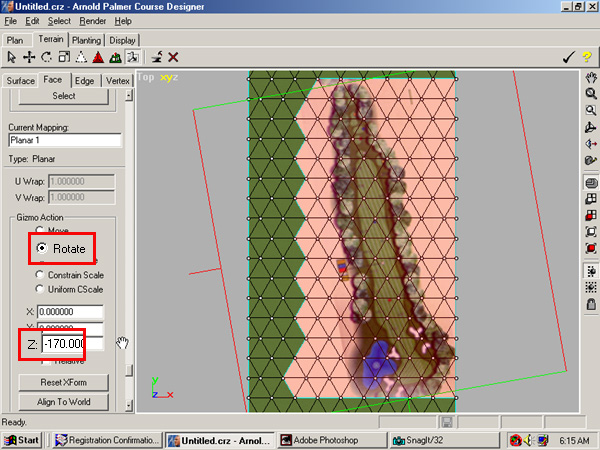
There we go - perfect - 405 yards. It's going the wrong way though. Time to rotate into position. Select "rotate" and this time we're dealing with ONLY the "Z" axis. It's a 360 degree circle. Anything above 180, the program changes to a "-". don't sweat it - in this case I typed in 190 and I got -170. |
 |
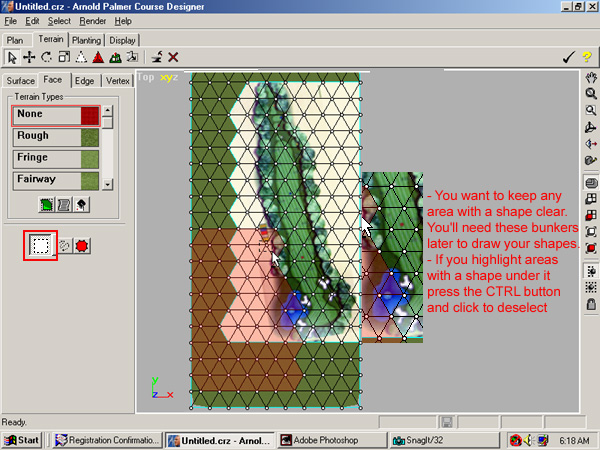
| Well, there's one hole, time to add another. The 3rd hole is 245 yards so I'll select off a 260-270 tract of land the same way that I did the second hole. Now in this case my holes are going to overlap a bit so I'm going to deselect any regions that I want to keep for the 2nd hole. Once you've highlighted a big enough block you can deselect by holding down the control key. I don't want to cover up any bunkers or fairway shapes as I'm going to change the face. Below you'll see that I had to deselect a few triangles in order to keep a couple of bunkers. |
 |
|
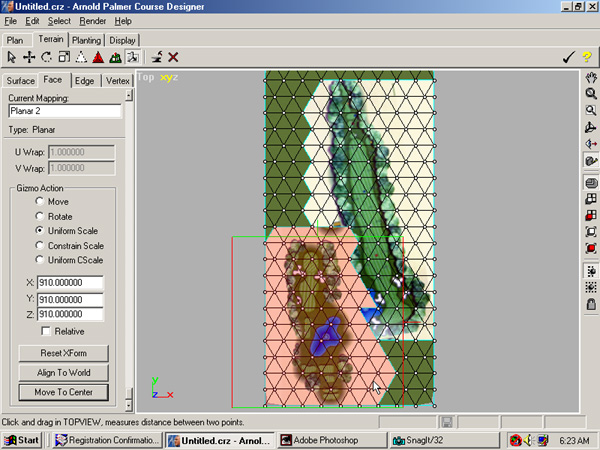
You'll see that I'm going to cut into the lake - it is also a part of the 3rd hole. So I'll use that as a guide to line the two up. First though I'll give the highlighted terrain face the "Hole 3" texture. Then I'll go through the tape measure, scaling and rotating procedure that I did for the 2nd Hole. |
 |
|
One other thing that I'm going to have to do is move the 3rd hole in order to line it up with the 2nd. To do that select "Move" place your mouse over the gizmo square and click, hold down and move. I'm going to try line up the lake and keep the 3rd hole tee boxes the proper distance from the 2nd green. |
 |
|
I'm guessing that the graphic artist who drew this took some liberties with the lake. No matter - when I create the shapes I'll compensate around the lake. Remember, this is just a guideline for you to use - it doesn't need to look perfect. Just make sure the shapes are where you want them. I've created and inserted no shapes, moved no verts and later, once I'm done creating my shapes, I'm going to get rid of these face textures. Anyhow, here's what I ended up with. From here I'll put the rest of the holes in and then work on creating shapes. |
 |
|
Here's a green shape - using the hole texture as a guide. The guide image will be a little fuzzy because it has been enlarged so much but I can still clearly see the edge line enough to make my shapes. |
|
|
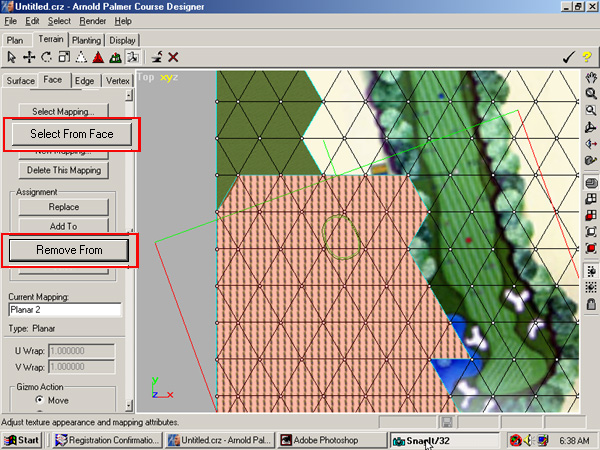
| One thing to remember is that I've "enlarged" all of these areas so before I start inserting shapes or assigning faces - I'll need to remove the mapping and change them back to a texture that I can use - In this case "rough." Highlight the "hole" using the regional select - click on the texture mapping button - "select from face" - then "remove" |
 |
|
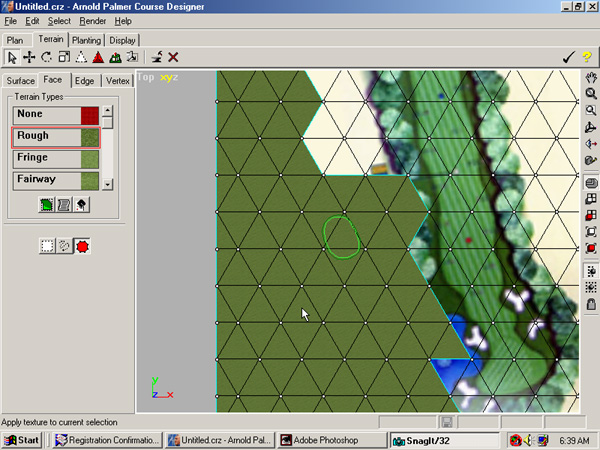
If you don't remove the mapping - any texture that you replace your hole texture with will be distorted. Now I'll go back to the Face select area and change the highlighted area to rough.. Any shapes that I drew are now sitting on a blank plot of rough - just like normal. |
 |